MoveIt Setup Assistant
Overview
The MoveIt Setup Assistant is a graphical user interface for configuring any robot for use with MoveIt. Its primary function is generating a Semantic Robot Description Format (SRDF) file for your robot. Additionally, it generates other necessary configuration files for use with the MoveIt pipeline. To learn more about the SRDF, you can go through the URDF/SRDF Overview page.
Step 1: Start
To start the MoveIt Setup Assistant:
roslaunch moveit_setup_assistant setup_assistant.launch
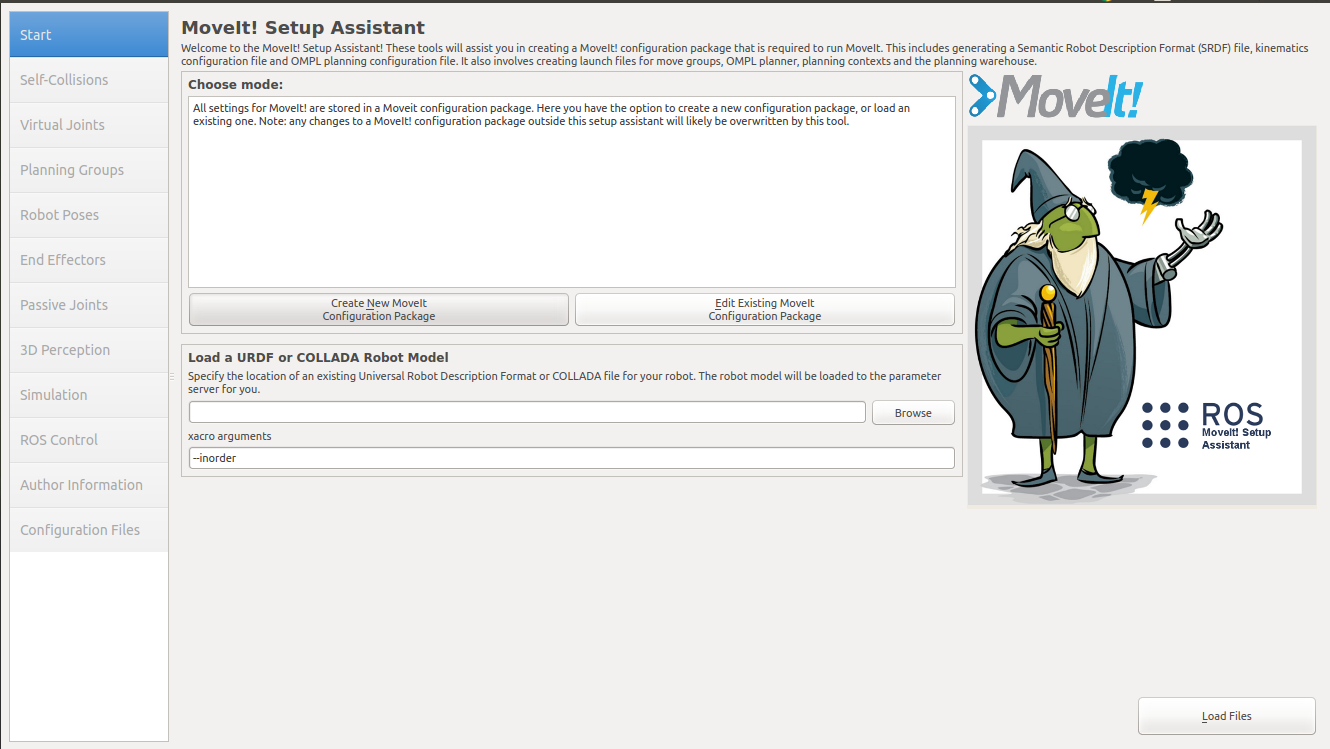
This will bring up the start screen with two choices: Create New MoveIt Configuration Package or Edit Existing MoveIt Configuration Package.
Click on the Create New MoveIt Configuration Package button to bring up the following screen:

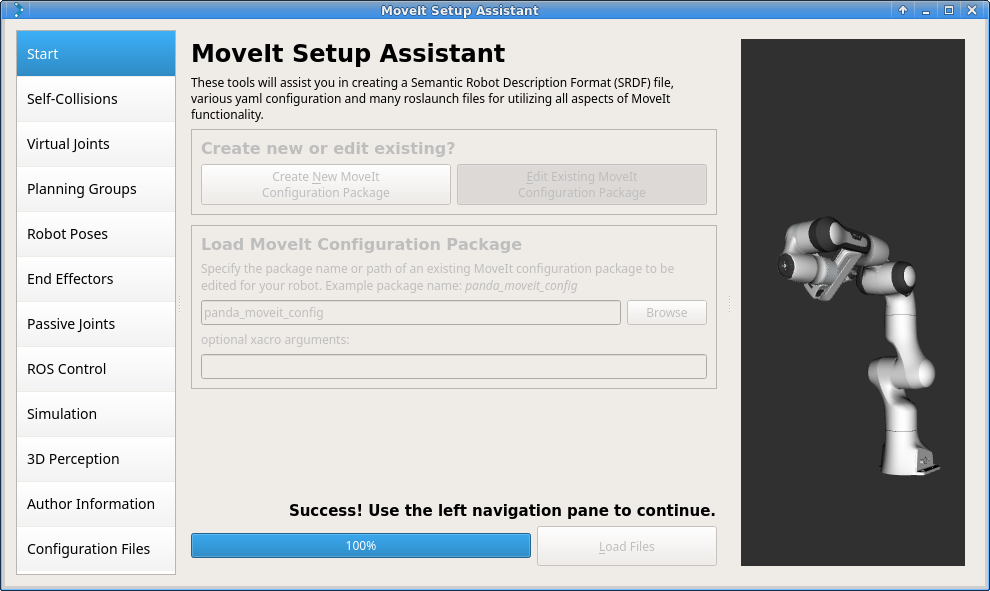
Click on the browse button and navigate to the ur_demo_description.urdf.xacro file installed when you installed the Franka package above. (This file gets installed in ~/moveit_ws/src/moveit_tutorial/urdf/ on Ubuntu with ROS Noetic.) Choose that file and then click Load Files. The Setup Assistant will load the files (this might take a few seconds) and present you with this screen:
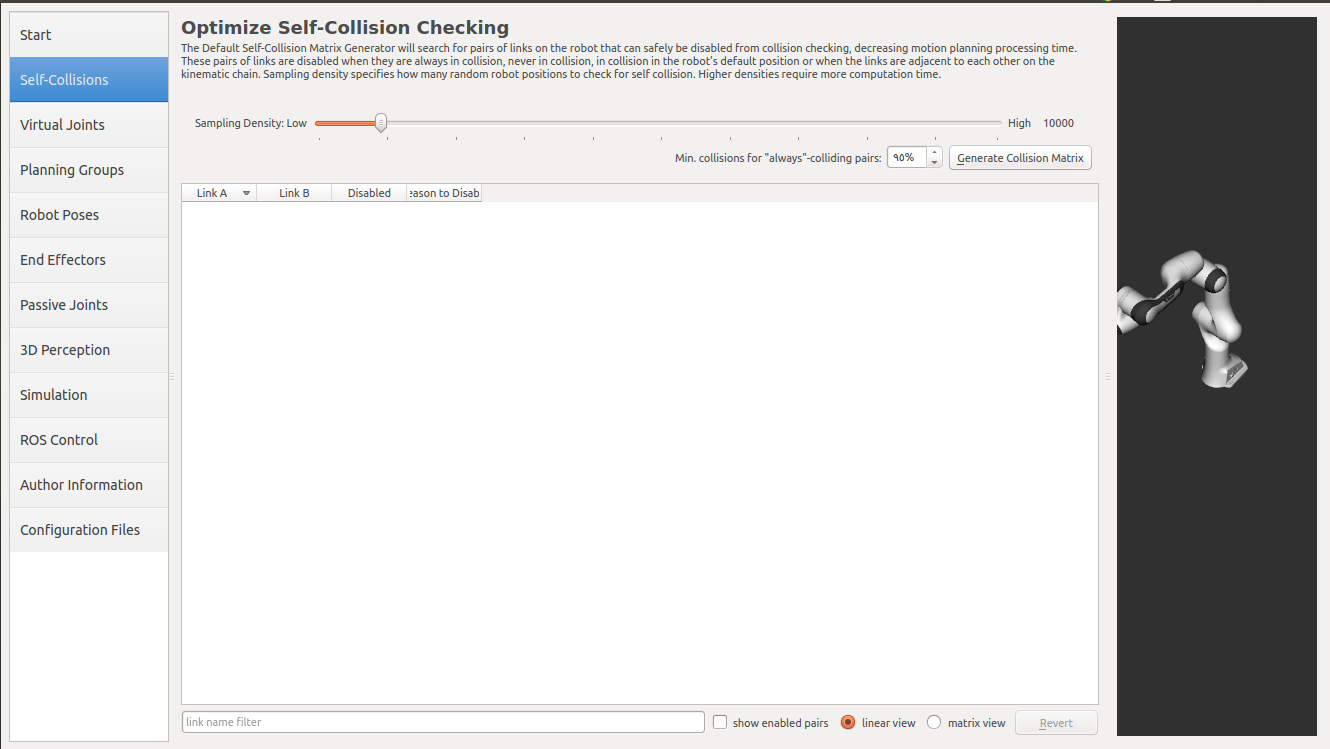
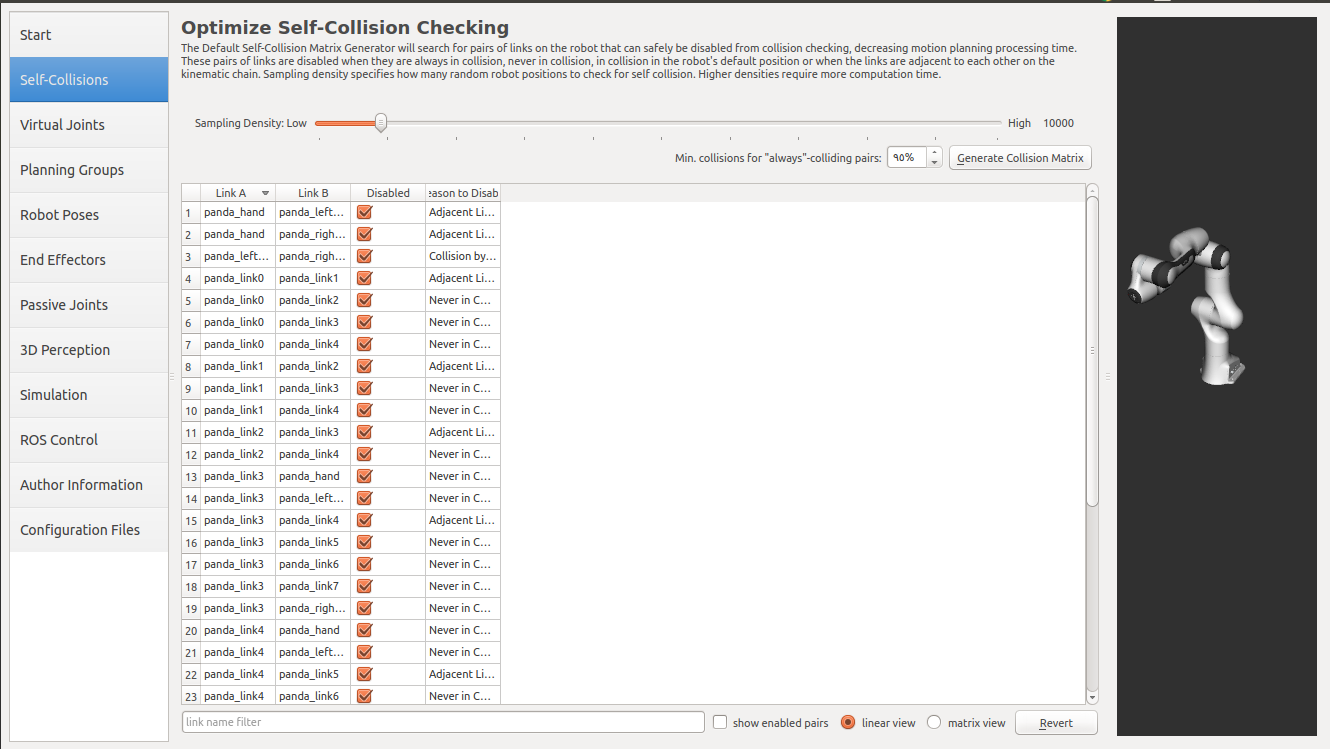
Step 2: Generate Self-Collision Matrix
The Default Self-Collision Matrix Generator searches for pairs of links on the robot that can safely be disabled from collision checking, decreasing motion planning processing time. These pairs of links are disabled when they are always in collision, never in collision, in collision in the robot’s default position or when the links are adjacent to each other on the kinematic chain. The sampling density specifies how many random robot positions to check for self collision. Higher densities require more computation time while lower densities have a higher possibility of disabling pairs that should not be disabled. The default value is 10,000 collision checks. Collision checking is done in parallel to decrease processing time.
Click on the Self-Collisions pane selector on the left-hand side and click on the Generate Collision Matrix button. The Setup Assistant will work for a few second before presenting you the results of its computation in the main table.
 →
→ 
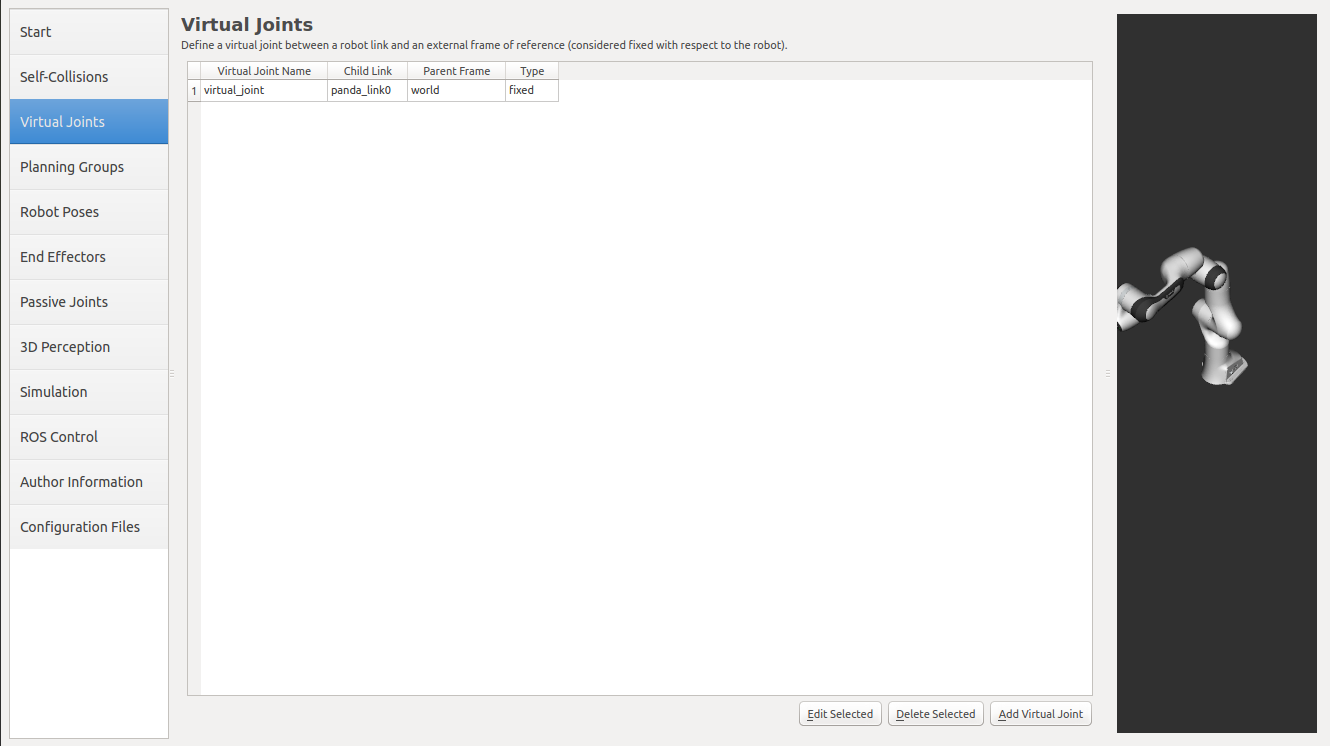
Step 3: Add Virtual Joints
Virtual joints are used primarily to attach the robot to the world. For the Panda we will define only one virtual joint attaching the panda_link0 of the Panda to the world world frame. This virtual joint represents the motion of the base of the robot in a plane.
Click on the Virtual Joints pane selector. Click on Add Virtual Joint
Set the joint name as “virtual_joint”
Set the child link as “panda_link0” and the parent frame name as “world”.
Set the Joint Type as “fixed”.
Click Save and you should see this screen:
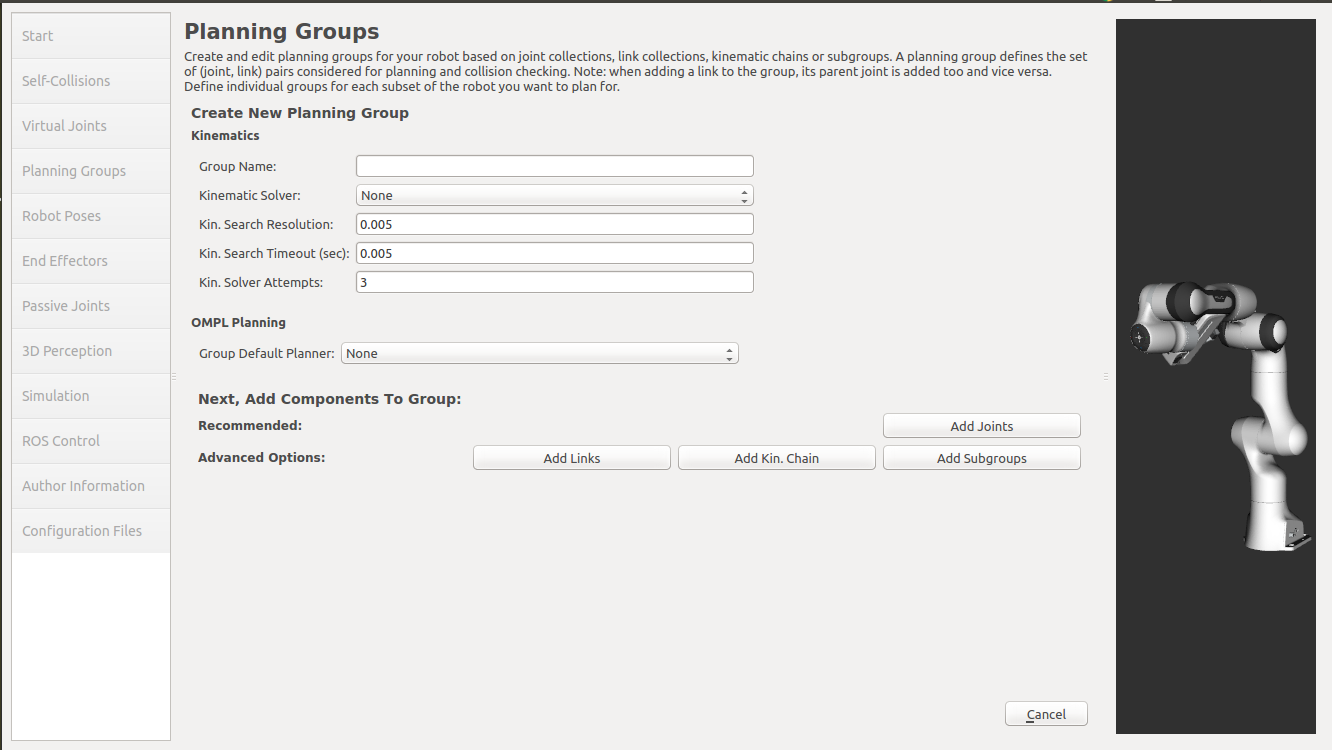
Step 4: Add Planning Groups
Planning groups are used for semantically describing different parts of your robot, such as defining what an arm is, or an end effector.
Click on the Planning Groups pane selector.
Click on Add Group and you should see the following screen:
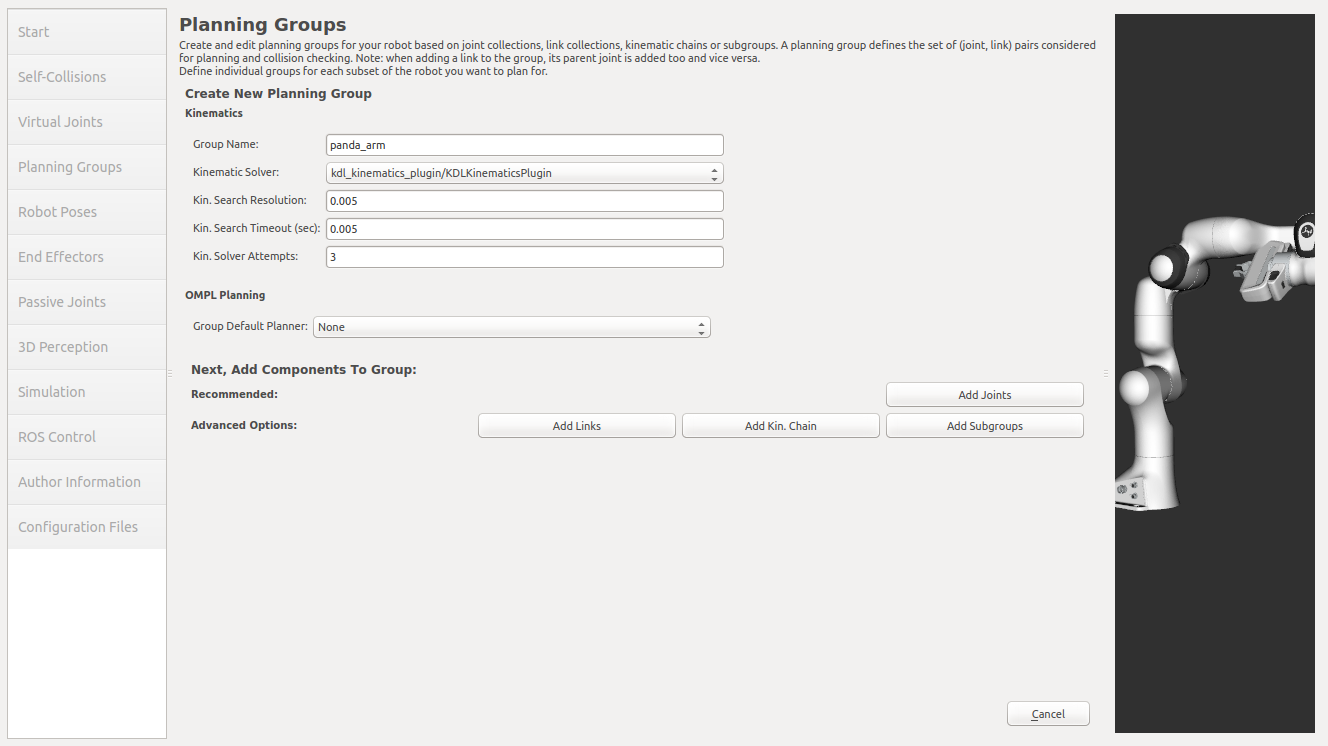
Add the arm
We will first add Panda arm as a planning group
Enter Group Name as arm
Choose kdl_kinematics_plugin/KDLKinematicsPlugin as the kinematics solver. Note: if you have a custom robot and would like a powerful custom IK solver.
Click on the Add Kin. Chain button and choose
base_linkas Base Link andee_linkas Tip Link.
The SetupAssistant includes the option to add poses. It is helpful to define poses that will be used often in later developing process e.g. a home pose for the robot.
Select Robot Poses
Click the Add Pose button
Choose a name for the pose and move the joints to a position that you like
Save the Pose
Skip the End Efectors and Passive Joints pane selectors.
Step 5: Add Author Information
Catkin requires author information for publishing purposes
Click on the Author Information pane.
Enter your name and email address.
Step 6: Generate Configuration Files
You are almost there. One last step - generating all the configuration files that you will need to start using MoveIt
Click on the Configuration Files pane. Choose a location and name for the ROS package that will be generated containing your new set of configuration files. Click browse, select a good location (for example, your home directory), click Create New Folder, call it “ur5_demo_moveit_config”, and click Choose. “ur5_demo_moveit_config” is the location used in the rest of the documentation on this wiki. This package does not have to be within your ROS package path. All generated files will go directly into the directory you have chosen.
Click on the Generate Package button. The Setup Assistant will now generate and write a set of launch and config files into the directory of your choosing. All the generated files will appear in the Generated Files/Folders tab and you can click on each of them for a description of what they contain.
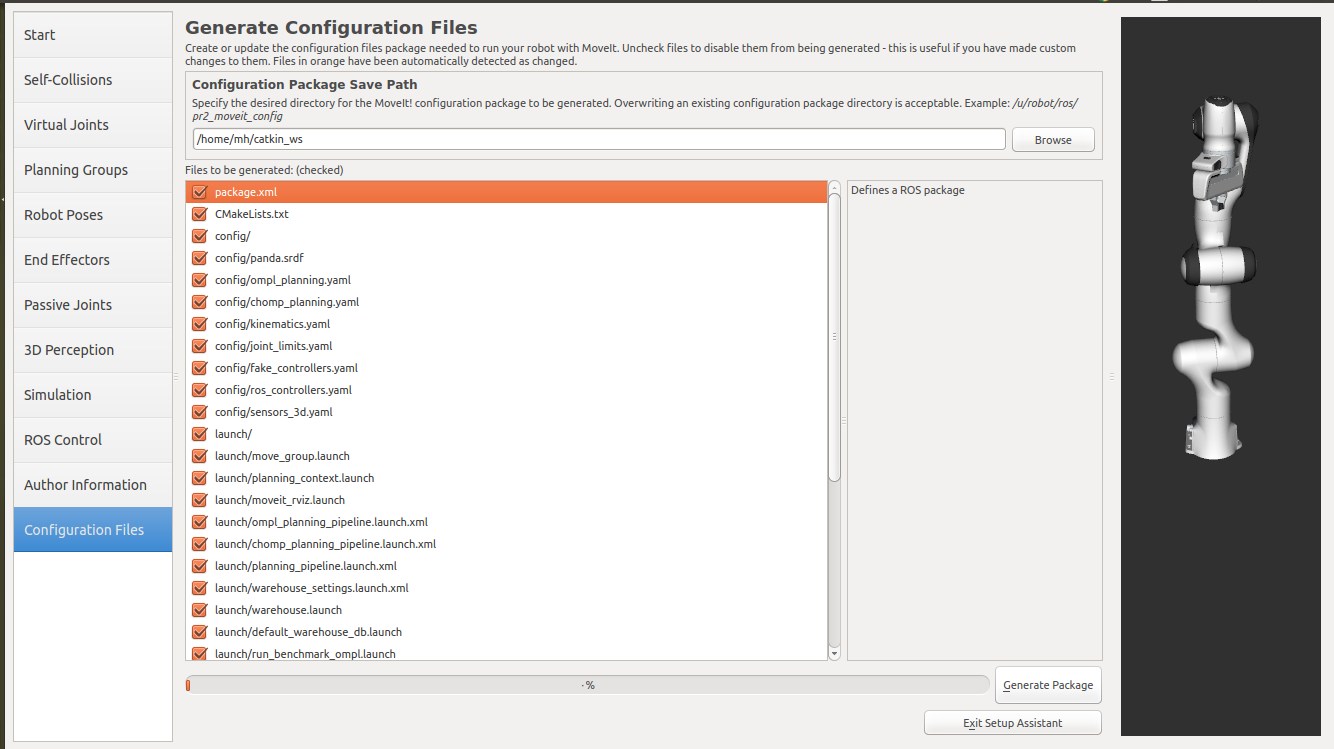
Congratulations!! - You are now done generating the configuration files you need for MoveIt
MoveIt! Usage
This section makes actual use of your newly created MoveIt! Package.
demo.launch
You can try out your newly created MoveIt! package by launching the following:
$ roslaunch ur5_demo_moveit_config demo.launch
RViz should start and the UR5 should be visualized.
Uncheck: Displays -> Motion Planning -> Planned Path -> Loop Animation
Select: Motion Planning -> Context -> Planning Library -> RRTConnectkConfigDefault
Select: Motion Planning -> Planning -> Query -> Select Start State -> Update
Select: Motion Planning -> Planning -> Query -> Select Goal State -> Update
Click on the Plan Button in the Commands category
You should see the robot moving on the computed path from the Start State presented in blue and silver to the Goal State presented in bellow.
Click on the Execute Button in the Commands category
The Start State should now be at the selected Goal State.
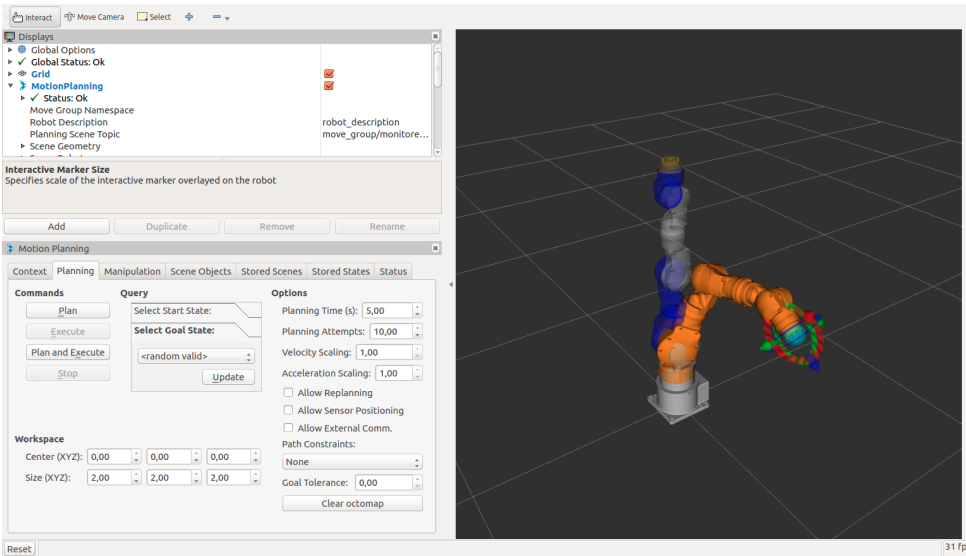
Motion planning in RViz.
Another possibility to change the Goal State is to move the interactive marker visualized near
to the tip link. After that you are able to use the Plan and Execute commands again.
There is also the possibility to add scene objects to your robotmodel. Change to
Scene Objects and select the Import File button. You will find a file named box.stl in
~/moveit_ws/src/tutorial_commons/meshes/ . After you open the file a green box appears.
Move the box somewhere next to the robot and move the robot from one side to the other. Click on
Click once the Publish Scene button to include the box in the planning environment of
the robot.
You will recognize, that the box is avoided because it represents a collision object.

Insert a scene object to the MoveIt! planning environment